
update 2020: Although the vast majority of stuff listed here still works on 2020, there is now WinGet that I’ve not personally worked with yet.
update 2019: If anyone is still reading this on 2019, after May 2019 Windows 10 Update, some PowerShell customizations (colours) won’t work anymore (reason is that they deprecated some PSReadLine.options values). I´ve switched to concfg to customize my shells.
Background
In one of my previous stories I told you about how I failed to adapt using a Mac laptop. For me, +20 years of typing on a standard keyboard, with its key placement was too much muscle memory. Other coworkers could adapt, but I was an avid gamer and using my home computer at the same time I was using a Mac for work turned into a no-way. Also, I almost don’t use my mouse when working in Windows or Linux since I’ve become one with the keyboard.
I wanted to be able to keep gaming on my laptop while avoiding purchasing additional disk space to dual boot it, I just thought, why not, we are living in the future, and I started my Ultimate Windows Workstation™

Being a fan of RHEL and since there isn’t yet a linux subsystem for windows based on RHEL (CentOS, Fedora…) I opted for a standalone environment, which means not installing cygwin nor the linux subsystems.
Package Managers
First I had to decide between the two major automated tools to deploy software on windows.
Being impressed by Homebrew and after using my beloved yum in RHEL during several years,
it had to be a cmd line tool.
There are to major tools right now on Windows, each one with its own pros and cons:
Chocolatey and Scoop
Scoop
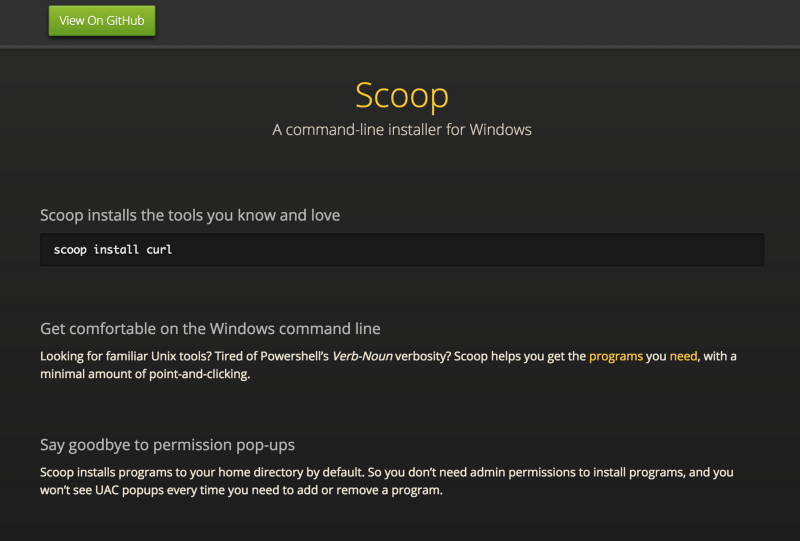
Scoop installs in the user space; that is no messing with your program files or program data folders;
and does not register almost anything within your environment.
It will add a path (usually in your ~home/scoop/shims much like a usr/local works.
One needs to think about scoop tools like portable ones.
The tools will be added to your ~home/scoop folder, and it can even maintain versions.
A special symlink (yes, windows supports those since long ago with mklink tool)
will maintain the current version while keeping the rest downloaded.
You can switch versions painlessly and install tools without any elevated prompt.
However, if you want to make the tools get on well together, you might run into some issues.
For example, ssh expects your .ssh in your home but since it is running kinda chrooted withing scoop, the .ssh folder
needs to be sitting on the ~home/scoop/ssh/?version? folder.
That means that it won’t look the default location and tools that interact with it (like the agent, and so)
won’t play well with it.
Then you end manually adding environment variables, paths and other obscure things and then you realize that maybe,
you’re not using the right tool.
You can add global installs and other kind of stuff but at that point it doesn’t start to feel right.
It just should be like yum or brew and not having to play with the setup files like make.
Chocolatey
Chocolatey defines itself as “The package manager for Windows”, and after having used it for several months, sure it is.
Even Microsoft itself has played with Chocolatey by implementing OneGet!. Most Chocolatey packages get converted or packed into a nupkg which plays nice on Windows.
Chocolatey uses nupkg and some PowerShell own extensions to bypass some UI wizards on most of the existing installer technologies, by thus bringing true unattended installs. You can use Chocolatey from the command line much like scoop to install any packages you find, and you can make it interact with the already installed ones if you want.
One of the things I liked from Chocolatey is the ability to maintain my software updated.
Just running choco upgrade all will upgrade my software, and I can even import the software I installed by myself.
On the other hand, I did not like the checksums checks on all packages. If a given package (cough drivefilestream cough) uses the same URL for downloading the installer, when the installer checksum changes, Chocolatey will complain, and you’ll need to add the flag to skip checksums. If you do that, Chocolatey might report an installed version older than the really installed one. Minor issue, isn’t it?
In contrast to scoop, Chocolatey is able to install both portable and standard packages, if one is able to build a
portable one.
By default, uses %PROGRAMDATA%folder (C:\ProgramData), which is protected from all users write so,
if any tool you use (like I explain below under the gradle section) needs to write to that folder you might run into
issues with that tool.
Before the latest versions Chocolatey installed on your root drive under the c:\Chocolatey folder but this has been
discouraged.
In fact, if it detects that it is running there, and you’re updating it, it will switch to the %PROGRAMFILES%
and %PROGRAMDATA% folders.
I enjoyed it so much, so I ended purchasing a personal PRO license for myself. I did this on the hopes that they add synchronization with manually installed software to the PRO users and not only the business ones soon. So far I have only automatic synchronization. This is one way sync (uninstalling from windows Chocolatey packages), but I want two-way (Chocolatey detecting manually installed packages also)
Chocolatey || Scoop ?
The answer is also a question: why not both?
For example, I found the sudo app from Scoop to be better that Chocolatey one, so I used that one from scoop.
Also, I maintain myself the tools that I want to keep updated myself or that have an auto-update feature.
I can install them with a Chocolatey script and either pin choco pin … them or just install them manually.
One script to rule them all

With all the improvements that Microsoft has made over the years to PowerShell I thought it was possible to pack a script to set up my environment.
I started with the basics, installing scoop and Chocolatey and documenting everything on a document, so I could potentially create The One Script.
Execution Policy
In order to make things work for this script, since it is going to run several unsigned scripts (at least during the
setup), one might need to enable them on PowerShell: set-executionpolicy unrestricted -s cu -f.
Don’t hesitate to restore it to the previous state if needed (write it down from get-executionpolicy -s cu).
On The One Script I will probably add a first and last line to alter and restore it.
ssh
One of the must-have tools if you already don’t have it is ssh. The new 2018 April patch brought ssh client to our windows desktops and servers, so we don’t need complicated setups to get it running.
To check if it is enabled on your workstation, on a privileged shell just run
Get-WindowsCapability -Online | where Name -like 'OpenSSH.Client*'
and if it is not installed, just install it with
Add-WindowsCapability -Online -Name OpenSSH.Client~~~~0.0.1.0
You’ll have to use the exact name from the first command (or automate it with some magic):
$ssh_client_capabilitry = `Get-WindowsCapability -Online | where Name -like 'OpenSSH.Client*'`
if ($ssh_client_capability) {
    `Add-WindowsCapability -Online -Name $ssh_client_capability.Name`
}
Once ssh is installed, we need to generate our keys, start the agent and add the keys to agent’s list of managed keys so any tool can use them as needed. As a bonus I’ll add the key as identity file for github:
# Make sure ssh agent is enabled and on autostart
Start-Service -Name ssh-agent
Set-Service -Name ssh-agent -StartupType Automatic

# create ssh keys
ssh-keygen -t rsa -b 4096 -C "[your_email@yourdomain.com](mailto:your_email@yourdomain.com)"
ssh-add $env:USERPROFILE/.ssh/id_rsa

# edit .ssh/config for github
Add-Content $env:USERPROFILE/.ssh/config "Host github.com"
Add-Content $env:USERPROFILE/.ssh/config "    Hostname github.com"
Add-Content $env:USERPROFILE/.ssh/config "    User git"
Add-Content $env:USERPROFILE/.ssh/config "    IdentityFile ~\.ssh\id_rsa"
Add-Content $env:USERPROFILE/.ssh/config "    # only use IdentityFile specified above, skip default ones"
Add-Content $env:USERPROFILE/.ssh/config "    IdentitiesOnly yes"
Basic Tools
I’ll also install some tools using Chocolatey
choco install jdk8
choco install greenshot
choco install git.install
choco install SkyFonts
choco install 7zip #or choco install 7zip.install
choco install gpg4win
cmd-line customizations
Next things to do is customize the cmd-line. Why? Again, why not? If you want to feel h4x0r or just love your own color scheme or fonts, it can also be automated.
I’ve been using Inconsolata for a while, but I’m switching to
Source Code PRO.I also love Roboto.
All of them are available through Chocolatey. By this time you’ll still bd running choco in a privileged prompt so
maybe it is time to install sudo as well.
As I said, I prefer scoop’s sudo to Chocolatey’s one.
Remember to remove sudo if you are running privileged:
scoop install sudo
sudo choco install Inconsolata
sudo choco install RobotoFonts
sudo choco install SourceCodePRO
You can make the fonts available to PowerShell console as well as to standard cmd, by editing the registry within PowerShell:
cd HKLM:
cd '.\SOFTWARE\Microsoft\Windows NT\CurrentVersion\Console'
Set-ItemProperty -Path TrueTypeFont -Name Inconsolata -Value 'Inconsolata'
Just right click on the console bar and on the properties context you can change the font to use.
Further customization for your shell / console
We all know your shell is your $HOME. Most of us want a customized shell. I remember having long long time ago
some cron tasks that changed my motd every day, and one funny server giving
a bohf-excuse after every command typed. Now I am older, some say wiser, and I certainly can say a little more
serious. That means no more bofh-excuses but still feeling at $HOME at my prompt.
I have tried several console replacements or wrappers for the standard shell and I must admit I have uninstalled all of them. However, I have solarized my shells and added a bunch of custom extensions or alias to my shell.
If you use git, knowing where you are in a repo is important and there are some extensions for PowerShell out there.
I won’t go into deep details about how to and where customize your profile, but one must know that there are
several profiles in a machine.
I set up mine to include several modules and other options:
Set-PSReadlineOption -BellStyle Noneto remove the abusive bell on the shell (seriously Microsoft, did you learn anything from Clippy?)- Chocolatey extensions that allow for command line completion
- poshgit from dahlbyk
- DockerCompletion or posh-docker if you are using older versions
- Regarding docker, I added my own module with some fancy stuff like a local permanent redis and a db docker containers, as well as some aliases to manage, clean and manipulate images and containers.
- For the solarized theme, I used this one.
AWS
Probably you will use AWS or equivalent. You can set up your environment variables from shell, but I don’t think this is a good idea. If I ever was a h4x0r everything I write would always send the environment variables of whenever it was being ran to one of my compromised servers, including those secrets as keys and such. Any program can read the environment variables so be careful where do you set or store them.
setx AWS_ACCESS_KEY_ID xxx
setx AWS_SECRET_ACCESS_KEY xxx
setx AWS_REGION us-west-1
IntelliJ IDEA
One can install IDEA from Chocolatey (which is nice). With IntelliJ I experienced some minor issues:
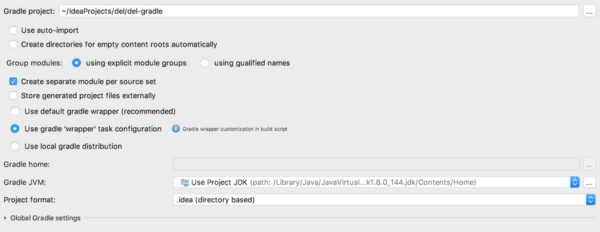
- When using gradle, IntelliJ uses
GRADLE_HOMEenvironment variable instead of~\.gradlefolder. This means that on a default install of Chocolatey’s gradle it will attempt to download gradle wrapper binaries to a privileged location. Usually, you won’t be running gradle scripts as a privileged user so any build will fail. Though there are several options to work around this (install gradle on another location, grant all users write permission to the wrapper folder of gradle install dir…), I found the most obscure and bizarre one to be the best one. If you remove theGRADLE_HOMEenvironment variable, everygradleinvocation will just use your local.gradlefolder, and you won’t have any issue. Even if I strongly discourage deleting from windows registry via scripts, you can delete the variable usingREG delete "HKLM\SYSTEM\CurrentControlSet\Control\Session Manager\Environment" /F /V GRADLE_HOMEor browsing HKLM as above in PowerShell. My recommendation here is to manually delete the environment variable from the computer properties, as the old-fashioned way. - Having a
~on my.ssh/configfile caused a NPE in IntelliJ IDEA on some setups (not to me), so you might need to replace with your full path. I suspect this has to do with native vs built-in ssh implementation. I opted for native.
- I am getting a NPE also if I import projects not using the
JAVA_HOMEfor the Gradle JVM option in the import dialog. This does not happen on new projects, just imported ones. It is just a minor issue that will probably be fixed. - Modifying gradlew files remove the executable bit for the linux users,
so if you run
gradle wrapper -=-gradle-version … --distribution-type allwill probably overwrite the permissions for that file. I’m pretty sure there will be a way to avoid that, but I won’t mess with it yet.
git
I am using the default git installation from Chocolatey and works pretty good.
One thing I tuned was gpg for my commits, and some flavors to my .gitconfig files:
.gitignore
# windows folder config
desktop.ini
.gitconfig
Note: For some reason, using ~ on gitconfig file was not working on Windows, as neither was using
$environment_variables. This does not apply to the special formatting of includeIf conditional config blocks.
# some options added by gpg below or git config above
[alias]
    # the acronym stands for "subtree add"
    sba = "!f() { git subtree add --prefix $1 git@github.com:my_copmany_id/${1%/}.git master --squash; }; f"
    # the acronym stands for "subtree update"
    sbu = "!f() { git subtree pull --prefix $1 git@github.com:my_copmany_id/${1%/}.git master --squash; }; f"
[commit]
    gpgsign = true
[core]
    excludesfile = C:\\Users\\juan\\.gitignore
    autocrlf = true
[url "git@github.com:"]
	insteadOf = https://github.com/
[includeIf "gitdir:~/workspace/personal/"]
    path = C:\\Users\\juan\\workspace\\personal\\.gitconfig
git and gpg
For gpg there is the gpg4win package on Chocolatey and to configure the keys it is not really complicated except for some key formats. The following steps were working for me:
gpg --full-generate-keygpg --list-secret-keys — keyid-format LONGgpg --armor — export <your key id from list above>- Paste on Github
- run
git config --global user.signingkey <your key id from list above>
I’m sure an avid reader can automate those steps with a single script (specially the --armor-export part).
Since you need to open it to paste on Github I’ve left this steps out of The One Script.
VPN
Setting up a VPN in linux or windows, if it is not using a vendor client can be painful, specially since developers don’t often have a networking background. Though that is not my case since I was some years ago certified IBM sysadmin on RHEL and I had been doing some networking setups.
Often companies have a site-to-site VPN and a per user vpn for roadrunners. If that the case, there can be either a VPN client from a specific vendor (like OpenVPN, Cisco, Fortigate) or a standard setup like ipsec, l2tp or similar. I’m not going to write about specific vendor stuff (or OpenVPN) but just add some details about the ipsec standard.
ipsec / l2tp
In order to make an ipsec/l2tp VPN running on windows there are some tricks to keep in mind:
- every change to the networking stack configuration needs a reboot. If you add, edit or remove a registry setting, you will probably need to reboot your computer.
- You can set up your standard VPN as a Windows connection with a script:
#general settings
$VpnName = connection_name
$gateway = endpoint_ip
$psk = your_secret_here
Add-VpnConnection -Name $VpnName -ServerAddress $gateway -TunnelType L2tp -AuthenticationMethod Chap -EncryptionLevel Optional -L2tpPsk $psk -Force -AllUserConnection -UseWinLogonCredential $false -SplitTunneling
- If you are behind a NAT (and you’ll probable be) you will need to edit a special value on the registry:
Set-ItemProperty HKLM:\SYSTEM\CurrentControlSet\Services\PolicyAgent -Name AssumeUDPEncapsulationContextOnSendRule -Value 2 -Type DWord
- As a topping, if you want to route only your internal traffic through the VPN (i.e. to route an A network
you’ll add
10.0.0.0/8asprivate_subnet/mask):add-VpnConnectionRoute -ConnectionName "connection_name" -DestinationPrefix "private_subnet/mask" -PassThru - If for any reason your VPN is stuck on verifying or other step, make sure you have rebooted after the registry
tweak above.
If not, I have found that sometimes, specially after an update, the checkbox
LCP Extensionson theVPN Properties -> Options Tab -> PPP settingsis disabled. Just re enabling it will make the VPN work again. You can access this setting on the adapter settings for your VPN connection in the old network and sharing center by just opening Control Panel. - Though not mandatory, I always like to disable the default GW on both IPV4 and IPV6 on the VPN properties. I do this manually but there are some commands to manipulate this from the registry or PowerShell. I do this because I want only the VPN traffic to be routed through it (unless I’m at a hotel where there is some kin of deep packet inspection or protocol filters that forbids videoconferencing, streaming or gaming.
Other customizations
I like having a workspace folder where I work.
I place it outside the annoying Documents and Settings by default but since some tools open by default that folder
I make a joint there.
Also, since I’m lazy I make the same joint on the root of my drive, so I don’t have the need to write long path names:
mkdir $env:USERPROFILE/workspace
sudo New-Item -Path $env:USERPROFILE/Documents/workspace -ItemType SymbolicLink -Value $env:USERPROFILE/workspace
sudo New-Item -Path c:/workspace -ItemType SymbolicLink -Value $env:USERPROFILE/workspace
I also added a bunch of docker aliases but actually I keep using the long commands since I forget the name of my own
aliases.
However, the aliases serve as a repository of useful commands, and the only thing I need to do is to type or edit my
aliases file from the command line like vim $PROFILE or similar and I have them there, waiting for me to use them.
Most of these additional customizations focus on my actual technology stack, like having a db docker image from our docker registry, or empty dockerized redis, or aliases and shortcuts (like opening Notepad++ from the command line), or some other context switching commands.
Most of the shortcuts have been added to my profile via the aforementioned different profiles in a machine. Pick your favourite and add there your shortcuts or aliases.
Originally published in Medium


Comments